Portals
A deep dive into portal development
Overview
In my specialization course (approximately three weeks of full-time work spread over eight calendar weeks), I set out to implement both the visual and gameplay systems for Portals in our own custom built C++/DX11 game engine (an engine developed from scratch, by me and my project group, named LAMP Engine).
This includes:
- Visual portal rendering, including recursive portal views
- Seamless camera and player movement through portals
- Core Portal gameplay features, such as shooting objects, lasers and energy bridges through portals
- Co-op multiplayer over LAN with no player limit

In short, this is achieved through additional render passes, custom portal render textures and dynamic portal cameras. It also involves a large amount of local-space transformations for objects, along with dealing with lots and lots of clipping and z-fighting issues.
And the long story? Let’s dive into the details.
Development
The Engine Setup
It all started on the graphics engine side. I figured I needed to add a separate render pass for each portal before the main screen render. Each pass renders the world using a custom camera and its own render target/depth stencil, then copies the result onto the portal’s material so it appears in the final pass.
Since our engine didn’t support custom render passes or render targets, I had to implement that setup myself. Thankfully my prior experience with DX11 helped a lot with creating, copying and setting shader resources and so on and so forth.
On the gameplay side, I created a portal object with a mesh, material, camera, render target, depth stencil and a reference to its paired portal.
The Visuals
To create the visual effect of looking through a portal, I used the camera from the other portal during the portal render pass. My first implementation simply placed a static camera at the center of each portal.
After spending some time debugging various DX11 errors in the render pass, I finally managed to get it to display something. At that point, I was quite relieved to have anything working visually. It wasn’t pretty, but it was a start.
First iteration with a static camera at the center of the portal
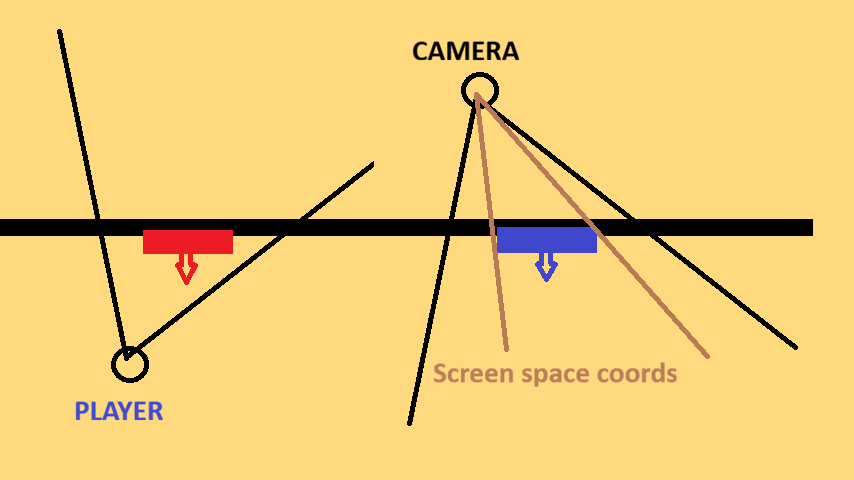
Sketch illustrating portals and the corresponding player and portal camera
However, I quickly realized that each portal needed a dynamic camera that moved with the player in order to properly convey the sensation of looking through one portal into another.
After a fair amount of testing and sketching portal and camera setups, I concluded that when rendering portal P1, the portal camera should occupy the same local space relative to P2 as the player’s camera does relative to P1. During this calculation, P1 is treated as front-flipped (see sketch to left and pseudo code below).
This immediately produced a much better visual representation of a portal, but two major issues became apparent.
First, the portal image appeared heavily zoomed out. This happened because the entire camera render texture was mapped onto the portal surface, whereas in practice the portal should only display what the camera would actually see through it (see same sketch). I solved this by using custom sampling UV coordinates in the portal’s pixel shader, which remapped the rendered texture to its screen space coordinates of the current camera. This ensured that only the visible portion of the camera view appeared on the portal, giving a correctly framed view through the portal.
Iteration with a dynamic portal camera using player’s and portals’ local space transformations
Final visual version using a dynamic camera in combination with correct texture sampling UVs
Second, the transformation placed the dynamic camera slightly behind the destination portal. As a result, the render often included geometry located behind the portal, which could block the camera’s entire view. I researched and experimented with oblique camera projection matrices, which are often used to solve this problem, but I was unable to make them work with my existing view matrix setup.
Instead, I passed the portal’s plane equation to the main pixel shader for all objects and discarded any pixel that was located behind the portal plane. It required some careful handling to enable and disable this behavior so that it would not affect the normal render pass, but once implemented it produced a very convincing result.
Pseudo code for transforming world transform from a portal to another while keeping relative local space
function GetWorldTransformationToOtherPortal(
                 objectWorldTransform,
                 currentPortalTransform,
                 otherPortalTransform):

# Flip the current portal so that looking into it mirrors correctly
flipForwardAndUpAxes(currentPortalTransform)

# Convert the object's world position into the local space of the current portal
objectLocalInPortal = objectWorldTransform * inverse(currentPortalTransform)

# Place that same local position relative to the other portal
resultTransform = objectLocalInPortal * otherPortalTransform

return resultTransform
Portal Activation
With the visuals complete, it was time to add gameplay functionality. The player can activate portals by shooting at the ground or walls with various rotation surfaces.
Through playtesting, I found that portals feel most natural when they are oriented upright along walls and facing the player on the ground. To achieve this, I use a PhysX raycast to get the hit position and the surface hit normal. The resulting portal orientation is calculated similarly to creating a camera rotation without roll.
Portal activation with different orientations
Portal activation with ground detection
Additionally, I implemented ground detection using a raycast to slightly raise the portal if it hits a wall but is too close to the ground, ensuring correct placement and avoiding clipping.
Holding Objects Through
To test the first real gameplay interaction, I implemented the ability to hold a cube through a portal and see it appear on the other side while moving it. Two main systems were required to achieve this.
First, I had to prevent physics conflicts when the cube intersected a portal. I solved this by disabling the cube’s PhysX collider when it entered a small trigger box placed in front of each portal and re-enabling it when leaving.
This turned out to be trickier than expected. Our PhysX scene sweep does not report trigger exit events when the collider is disabled, which meant the cube could become stuck in a non-colliding state. After some research, I found a PhysX function that allows manually checking whether an actor is inside a specific trigger volume, which I used to reliably detect when the cube left the portal trigger.
Holding a cube through the portal and creating a visual duplicate through the second portal
Clipping the object holding through so it does not appear behind the portal
Second, to visually show the cube passing through the portal, I created a duplicate cube at the destination portal. Its transform is calculated using the same portal transformation logic used for the portal cameras, making the duplicate appear as a seamless continuation of the original object.
Finally, I noticed that the effect looked incorrect if the original cube remained visible behind the portal. To fix this, I clipped the original cube when it passed behind the portal plane. Similar to the portal rendering solution, I passed the portal plane equation to the cube’s pixel shader and discarded pixels behind the plane, ensuring only the correct portion of the object was visible.
Shooting Objects Through
Sending objects through portals was fairly straightforward once the “holding objects through portal” system was working. I reused the same core logic of disabling collisions near the portal and creating a duplicate object when entering or exiting the portal trigger.
To detect when an object should teleport, I checked whether its pivot point had crossed the portal plane after entering the trigger volume. Once it passed the plane, I teleported the object by transforming its full transform (position and rotation) using the same portal-to-portal transformation math used for the camera.
Shooting lots of objects through the portals
Some portal gameplay involving springboards
Next, I added a utility function to transform velocity vectors between the two portals’ local spaces similar to a full transformation matrix. After teleporting the object, its velocity is converted using this function so it exits the destination portal with the correct direction and speed.
Finally, I added a safeguard to prevent objects from teleporting repeatedly in rapid succession, which could otherwise cause infinite teleport loops for certain velocities.
One minor drawback of temporarily disabling the object’s collider was that if an object was thrown right at the foot of the portal, it sometimes fell through the floor. This issue was addressed later.
Finally Walking Through
Implementing player traversal required a different approach than objects. I couldn’t disable the player’s collider like before, since the player would fall through the floor. Instead, I temporarily disabled the collider of the surface (wall or floor) the portal was attached to. The rest of the system worked similarly to object teleportation: a duplicate player is created on the other side of the portal. Since the player uses skeletal animation, I synchronized the duplicate by copying the joint transforms each frame.
Two issues appeared.
First, entering the portal caused clipping and flickering. Preventing or reducing this required setting an extremely small camera near-plane and placing the portal very close to the surface, which introduced noticeable Z-fighting between the portal and the wall.
Z-fighting and clipping issues when walking through portals
Visible duplicate player model when standing between portals – with some clipping issues
I solved this by turning the portal into something similar to a projected 3D decal. Instead of relying on the depth test for surface placement, the portal is always rendered and the pixel shader discards pixels that are not close enough to the surface. This eliminated both clipping and Z-fighting while allowing a normal near-plane. However, when looking straight between portals (see video), some clipping still occurs, which I wasn’t able to fully resolve with this approach. Potential solutions are discussed further in the Reflection section.
The second issue was collision. Disabling the wall or floor collider affected a much larger area than the portal itself, especially visible on floors where the player could fall through beside the portal. I fixed this by adding a custom mesh collider with a hole matching the portal shape. I created the mesh in Blender by subdividing a plane and cutting out a circular opening, then used it as a PhysX collider for the portal surface.
The final result worked very well, even when walking through portals while holding an object.
Additionally, as a side benefit, because the wall collider is now disabled, I no longer need to disable the cube’s collider when holding or throwing it, which resolved the issue of objects falling through the floor.
Teleporting through portals seamlessly after solving the clipping and z-fighting issues
Player Camera
My first implementation of teleporting the player, with a first-person camera attached, involved simply transforming the camera’s full matrix transform through the portal and then extracted the new position, pitch and yaw values, which my camera implementation is based on.
After playing around, I discovered an issue that occurred when exiting a portal with camera roll. Because my camera system assumed zero roll, common in many games, it would instantly correct the rotation, causing a visible snap.
To solve this, I refactored the camera controller to support roll as well. The roll value is gradually moved back toward zero after teleportation, producing a smooth transition instead of an abrupt snap, see video.
Camera with auto roll when going between portals
Recursive Portals
Implementing recursive portals was by far the most challenging part of the project. I experimented with several different approaches, each getting me a bit closer and finally producing the correct result.
One early idea was to reuse the previous frame’s portal texture and render on top of it, but this did not produce convincing recursion, just a very long tunnel. I also tried rendering the same camera multiple times and copying the render texture to the portal between passes, but due to the portal’s UV mapping each new render simply overwrote the previous one.
Portals without recursive portal views
One of many failed attempts at recursive portal views
Another attempt, as a continuation of the previous one, involved more advanced UV mapping that depended on how many portals you were looking through. This looked promising at first, but the illusion broke down when standing close to the portal. I also experimented with applying a fixed camera offset for each recursive render, which worked only when the portals were perfectly aligned in front of each other.
However, with the two previous attempts starting to look more correct and a lot of sketching and rethinking how recursive viewing actually works, I realized the correct approach was simpler. Recursively transform the camera through the portal itself. For each recursion level, I apply the portal-to-portal transformation to the camera again and render the scene. This effectively moves the camera deeper through the portal pair each pass, producing a convincing recursive effect.
Final successful recursive portal views
Holding and throwing stuff through recursive portals
Co-op Over LAN
Playing Portal 2 co-op is one of my favorite gaming experiences, so from the very start I wanted my system to support multiplayer if time allowed.
Therefore, already from the beginning of the project, my portal systems were separated from the player logic. The only interaction is that a player can activate and deactivate a portal with a specific transform. Teleportation also treats players as regular game objects, meaning the system supports multiple players moving through portals.
Previously, as a side project, I had already implemented co-op in our group’s 3D platformer by setting up a separate server application and synchronizing player transforms, colliders and animations between clients using TCP network messages over LAN.
Adding multiplayer to the portal system therefore mainly required introducing a new network message for activating and deactivating portals, as well as creating and pairing portals when a new player joins the server.
The final result works very well and, from a technical standpoint, can handle an unlimited number of players, though in practice performance naturally sets the limit. In testing, I successfully ran the system with five players on separate computers without any issues.
Some co-op multiplayer shenanigans
Demo of co-op functionality over LAN with one server (top left) and three clients running on the same PC. Note that Windows 11 limits performance on applications not in focus and therefore it is a bit laggy on the two bottom clients.
Laser and Bridge
As a final part of the specialization, I implemented the laser, laser cube and walkable energy bridge inspired by Portal. The laser works by recursively raycasting through portals. When a ray hits a portal, I transform both the hit position and ray direction using the same portal-to-portal transformation used elsewhere, then continue the raycast from the new position. Visually, the laser itself is simply a stretched cube.
Detecting hits on the portal required some extra handling. Since the portal does not have a physical collider, I raycasted against the portal’s trigger box. However, this produced a hit slightly in front of the portal, leaving a visible gap in the laser at the portal surface. To fix this, I instead calculated the exact intersection point between the ray and the portal plane using a ray plane intersection formula.
Laser gameplay with cube and portal
Walkable energy bridge gameplay
For the energy bridge, I also needed a PhysX collider so the player could stand on it. Our PhysX wrapper did not support creating custom colliders at runtime, so I extended it to allow this. Because generating a new collider every frame was relatively expensive, I added a check that only recreates the collider if the bridge’s shape changes from the previous frame.
The result is a very playable and functional portal system with the core gameplay features seen in Portal.
Polish and Optimization
As a final polish step, I added a colored border with a soft inward fade to the portals, along with a small opening animation when they are placed, all through the pixel shader. One of the more noticeable improvements is that the portal outline remains visible even when the portal itself is partially hidden behind other objects (see video).
This effect is implemented in the portal’s decal like pixel shader. Instead of discarding pixels that are not close to a surface, the shader renders a custom border texture (quickly created in PowerPoint and inspired by Portal). The border also fades based on the viewer’s distance to the portal, which helps it blend more naturally into the scene.
Portals visible behind structures using my custom render state and pixel shader.
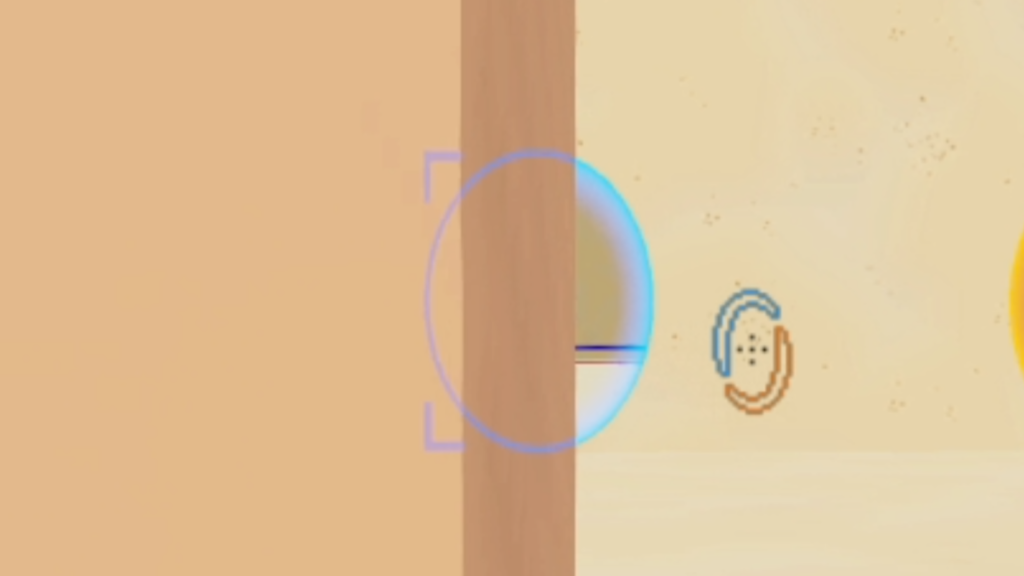
Zoomed in version of the custom border texture when the portal is partially hidden.
Performance wise, the system runs quite well, maintaining 100+ FPS on my home PC. Since recursive portals can result in 10+ render passes per frame, I added several levels of frustum culling.
First, the regular and portal camera frustum culls the world geometry. Second, each portal is also frustum culled, if a portal is outside the camera view, its render pass is skipped entirely. Finally, during recursive portal rendering I check whether another portal is visible inside the current portal view. If not, additional recursive render passes are skipped.
Conclusion and Reflection
Overall, I’m very happy with what I accomplished in roughly three weeks of full-time work, a fully playable portal system with the core mechanics from Portal.
However, there is always room for improvement. I didn’t fully solve the clipping issue when standing between portals and looking parallel to them. I found resources suggesting that rendering the portal as a cube without backface culling can fix this. When standing inside the wall, you are effectively inside the cube and therefore see the portal correctly. I tried to implement this late in the project, but much of my system relied on the decal-like portal approach, so I didn’t finish it.
I also didn’t synchronize movable objects in co-op. Achieving that would likely require moving the PhysX simulation to the server rather than individual clients, which was outside the scope of the project.
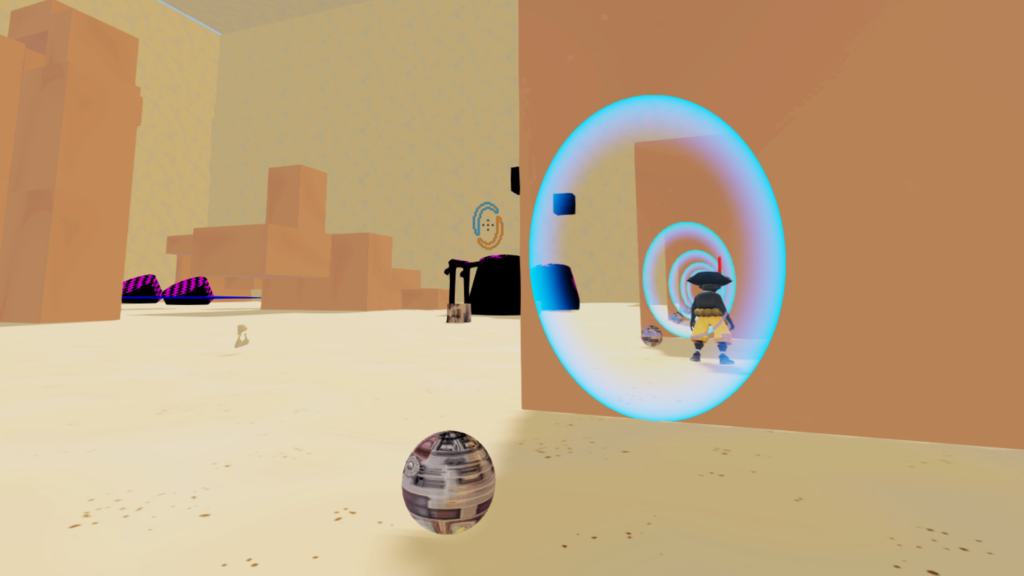
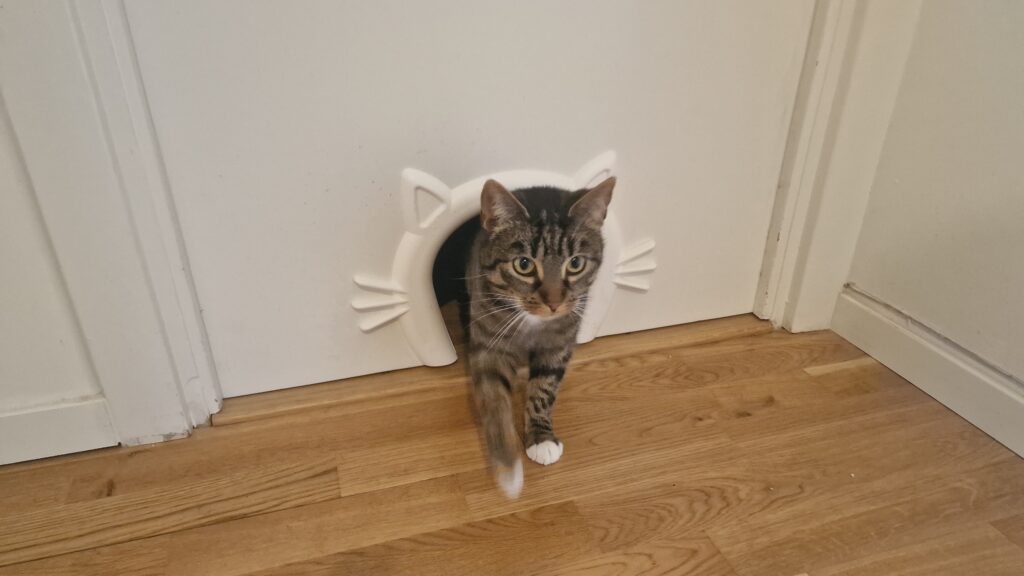
My cat, Sissi, testing the bedroom cat portal
Despite these limitations, I learned a lot about additional rendering passes, setting up gameplay systems, DX11 and PhysX. It was a fun and challenging project, especially in using our own engine, that involved problem solving across both graphic and game engine systems. The project also involved a lot of gameplay tuning and polish which I really enjoy.
In conclusion, this project has been a learning experience and I’m proud of the portal system I built. Thank you for taking the time to explore my development journey into the world of portals.
Credits
Since my specialization builds on a very early version of Group project 6, I would like to acknowledge my team’s contributions. While I independently developed the player, the camera and all features discussed in my specialization, the underlying engine and other features outside the scope of this project were created collaboratively. Without my team, Behemoth, I would have had little more than cubes and cylinders to work with, so I am very grateful for the opportunity to build on our shared work.